Extending pythreejs
While you can do a lot with pythreejs out of the box, you might have some custom rendering you want to do, that would be more efficient to configure as a separate widget. To be able to integrate such objects with pythreejs, the following extension guide can be helpful.
Blackbox object
Pythreejs exports a Blackbox Widget,
which inherits Object3D. The intention is for
third-party widget libraries to inherit from it on both the Python
and JS side. You would add the traits needed to set up your object,
and have the JS side set up the corresponding three.js object. The
three.js object itself would not be synced across the wire, which is
why it is called a blackbox, but you can still manipulate it in a
scene (transforming, putting it as a child, etc.). This can be
very efficient e.g. for complex, generated objects, where the
final three.js data would be prohibitively expensive to synchronize.
Example implementation
Below is an example implementation for rendering a crystal lattice. It takes a basis structure, and then tiles copies of this basis in x/y/z, potentially generating thousands of spheres.
Note
This example is not a good/optimized crystal structure viewer. It is merely used to convey the concept of a widget with a few parameters translating to something with potentially hugh amounts of data/objects.
Python:
import traitlets
import pythreejs

class CubicLattice(pythreejs.Blackbox):
    _model_name: traitlets.Unicode('CubicLatticeModel').tag(sync=True)
    _model_module = traitlets.Unicode('my_module_name').tag(sync=True)

    basis = traitlets.List(
        trait=pythreejs.Vector3(),
        default_value=[[0, 0, 0]],
        max_length=5
    ).tag(sync=True)

    repetitions = traitlets.List(
        trait=traitlets.Int(),
        default_value=[5, 5, 5],
        min_length=3,
        max_length=3
    ).tag(sync=True)
JavaScript:
import * as THREE from "three";

import {
    BlackboxModel
} from 'jupyter-threejs';


const atomGeometry = new THREE.SphereBufferGeometry(0.2, 16, 8);
const atomMaterials = [
    new THREE.MeshLambertMaterial({color: 'red'}),
    new THREE.MeshLambertMaterial({color: 'green'}),
    new THREE.MeshLambertMaterial({color: 'yellow'}),
    new THREE.MeshLambertMaterial({color: 'blue'}),
    new THREE.MeshLambertMaterial({color: 'cyan'}),
];

export class CubicLatticeModel extends BlackboxModel {
    defaults() {
        return {...super.defaults(), ...{
            _model_name: 'CubicLatticeModel',
            _model_module: 'my_module_name',
            basis: [[0, 0, 0]],
            repetitions: [5, 5, 5],
        }};
    }

    // This method is called to create the three.js object of the model:
    constructThreeObject() {
        const root = new THREE.Group();
        // Create the children of this group:
        // This is the part that is specific to this example
        this.createLattice(root);
        return root;
    }

    // This method is called whenever the model changes:
    onChange(model, options) {
        super.onChange(model, options);
        // If any of the parameters change, simply rebuild children:
        this.createLattice();
    }

    // Our custom method to build the lattice:
    createLattice(obj) {
        obj = obj || this.obj;

        // Set up the basis to tile:
        const basisInput = this.get('basis');
        const basis = new THREE.Group();
        for (let i=0; i < basisInput.length; ++i) {
            let mesh = new THREE.Mesh(atomGeometry, atomMaterials[i]);
            mesh.position.fromArray(basisInput[i]);
            basis.add(mesh);
        }

        // Tile in x, y, z:
        const [nx, ny, nz] = this.get('repetitions');
        const children = [];
        for (let x = 0; x < nx; ++x) {
            for (let y = 0; y < ny; ++y) {
                for (let z = 0; z < nz; ++z) {
                    let copy = basis.clone();
                    copy.position.set(x, y, z);
                    children.push(copy);
                }
            }
        }

        obj.remove(...obj.children);
        obj.add(...children);
    }
}
This code should then be wrapped up in a widget extension (see documentation from ipywidgets on how to do this).
Usage:
import pythreejs
from IPython.display import display
from my_module import CubicLattice

lattice = CubicLattice(basis=[[0,0,0], [0.5, 0.5, 0.5]])

# Preview the lattice directly:
display(lattice)

# Or put it in a scene:
width=600
height=400
key_light = pythreejs.DirectionalLight(position=[-5, 5, 3], intensity=0.7)
ambient_light = pythreejs.AmbientLight(color='#777777')

camera = pythreejs.PerspectiveCamera(
    position=[-5, 0, -5],
    children=[
        # Have the key light follow the camera:
        key_light
    ],
    aspect=width/height,
)
control = pythreejs.OrbitControls(controlling=camera)

scene = pythreejs.Scene(children=[lattice, camera, ambient_light])

renderer = pythreejs.Renderer(camera=camera,
                              scene=scene,
                              controls=[control],
                              width=width, height=height)

display(renderer)
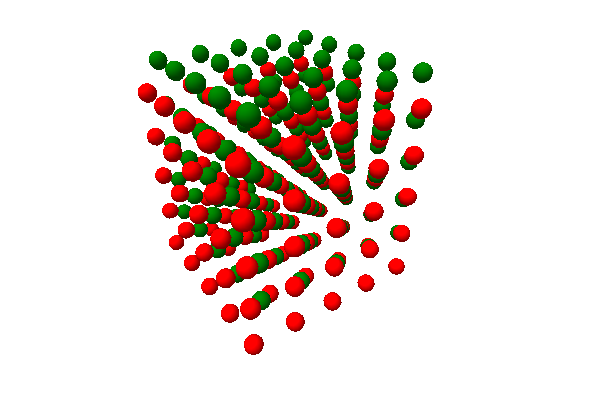
Figure: Example view of the rendered lattice object.